These are one of my favorite foods.
My grandmother and my mother frequently made dumplings for me to eat as a kid. Sometimes, I even helped them wrap the dumplings (although it took a recent conversation with my mom to remind me of this; I distinctly remember the eating part, but apparently not the labor-intensive wrapping part…) We usually combined ground pork with vegetables such as cabbage, onions, and a crunchy black fungus, and then served the dumplings in a broth with bean sprouts and scallions.
Only in college did I realize that many Chinese restaurants, particularly around the east Los Angeles area where I frequently ate, serve dumplings in all varieties of fillings and wrappings! For example, the well-known soup dumpling is made with a thin and elastic wrapper that bursts open with broth once bitten into. Hong Kong style “baos,” like my grandpa’s favorite steamed pork buns that are commonly available at dim sum, fill the other end of the dumpling spectrum. These baos, with their fluffy texture and slightly sweet exterior that completely envelope either a sweet or savory interior filling, resemble stuffed breads more than dumplings. After trying many of these different dumplings, I learned that typically the style of dumpling changes with the geography of China and Chinese cuisine—dumplings from the southern, warmer regions tend to be lighter and have thinner wrappers, while dumplings from the north tend to be richer and exhibit more dense wrappers.
I can’t remember a single dumpling or bao that I’ve eaten and didn’t enjoy. However, my absolute favorite is the “woh-teep”—a pan-fried potsticker known for its chewy and crispy exterior. I frequently order these when I am at a Shanghai-style restaurant, and after watching Ming Tsai teach how to make potstickers on his cooking show, I decided that it would be fun to have potstickers for dinner one night.
I’ve made dumplings a few times before from scratch, starting with a hot water dough made with water, flour, and salt. The general technique for making dumplings is extremely labor intensive, but not difficult to execute. Before acquiring a stand mixer, I used to mix and knead the dough by hand, starting in a glass bowl with a wooden spoon to get the flour/water/salt mixture to roll into a dough ball, picking up and incorporating all loose flour in the bowl and leaving behind no excess trails of moisture. The mixing technique with the stand mixer and bread hook is similar, but imaginably and thankfully easier—just toss all the dry and wet ingredients into the mixer, start on low, then continue on medium for several minutes after the dough ball forms. Then, I let the dough rest covered on the counter before rolling it out into wrappers. I think (but am not certain) that the kneading time is necessary for gluten networks to form so that the dumpling skin, when rolled thin, is strong enough to wrap around the filling without breaking; and the resting time is necessary for the gluten to relax so that the dumping skin, when rolled out, does not seize and shrink back into its pre-rolled state.
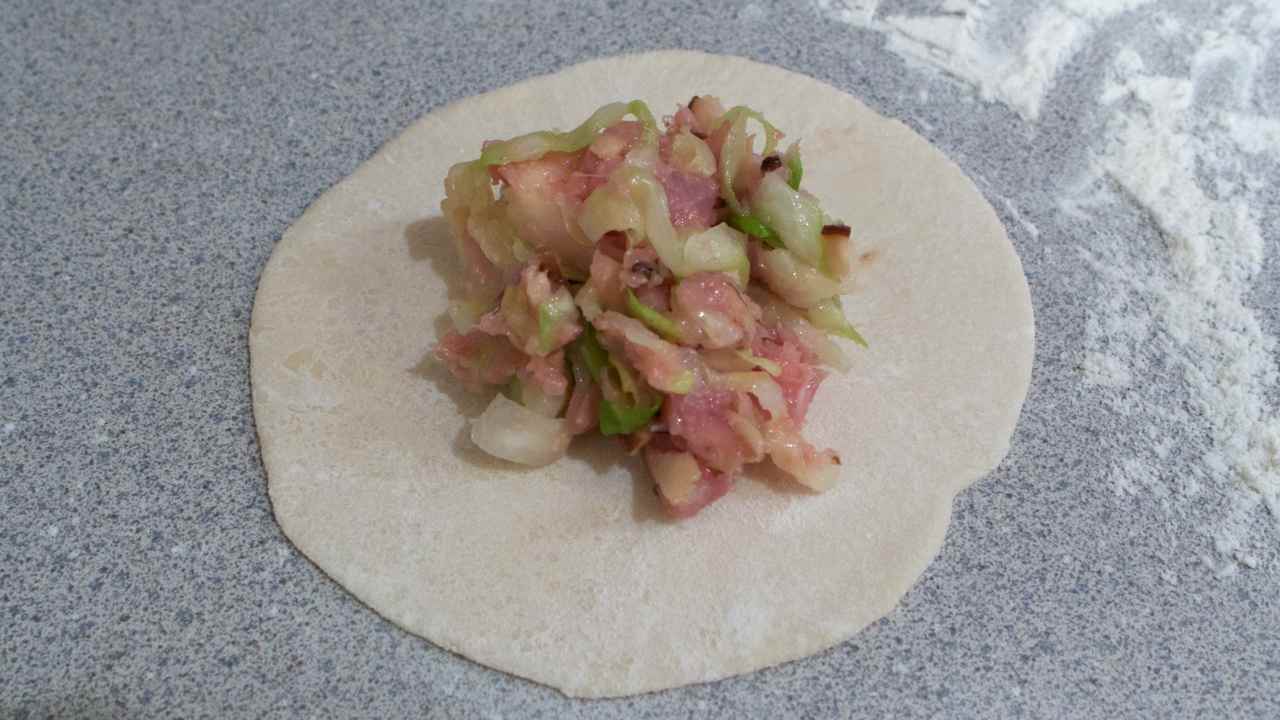
While waiting for the dough to relax, I prepared the filling by mixing together ground chicken thigh meat, cabbage, red onion, ginger, sesame oil, soy sauce, salt, and white pepper. Although I love ground pork as a dumpling filling, I have had difficulty finding reputable sources for ground pork in Boston, and I had already used up my season’s purchase from Copicut Farms in pasta sauces. So, for the filling, I deskinned, deboned, and then ground chicken thighs in the food processor; coarsely chopped and salted the cabbage to draw out water, and then rinsed the cabbage to remove most of the salt; finely chopped the onion and ginger; and then mixed everything together.
Wrapping dumplings: perhaps one of the most labor-intensive food activities that I’ve ever done
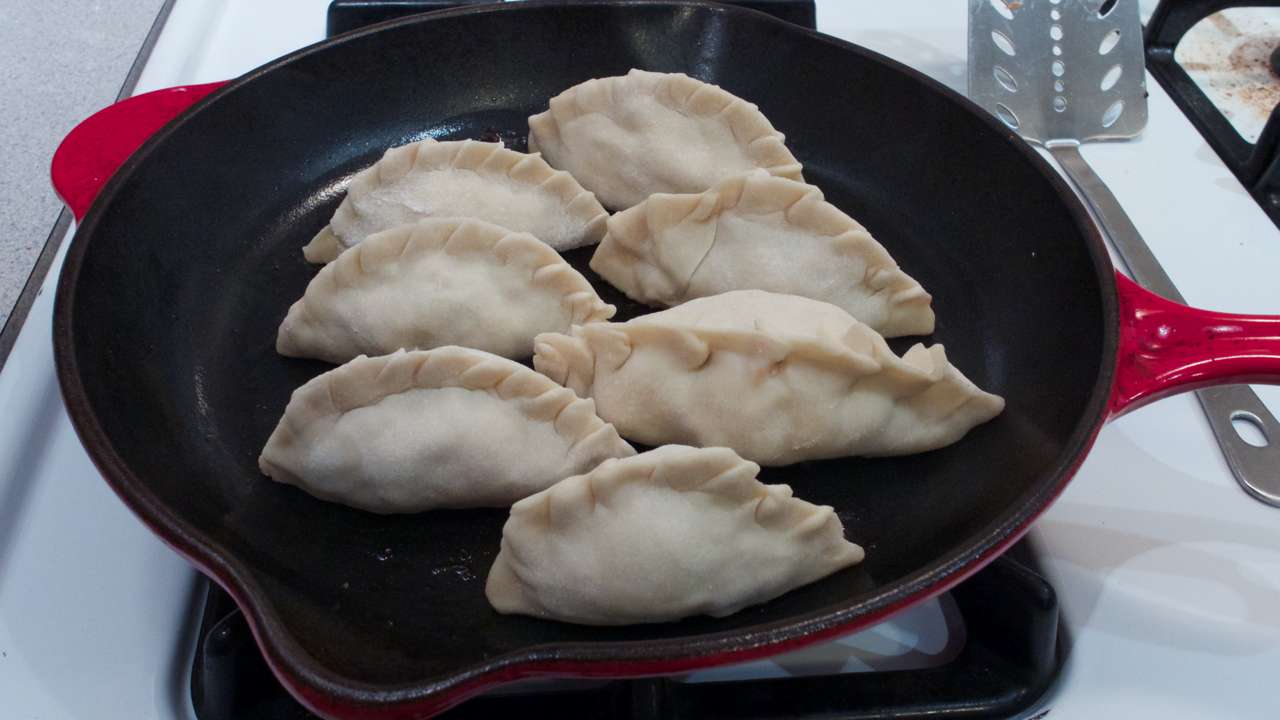
About an hour and fifteen minutes into this adventure, the labor-intensive dumpling-filling-and-wrapping began! Nathan came to help me. We created individual wrappers by separating the dough ball into three, rolling each into dowel-like strips, and then cutting at every inch. We filled each wrapper as much as we could (because small dumplings are the sign of poor workmanship!), folded each dumpling in half like a taco, and then intricately crimped the edges by grabbing the dough with our thumbs and index fingers and moving left hand over right. The entire process took another hour and half and only produced about thirty dumplings! (Of course, we only ate half and froze the other half for a future “emergency” meal.)
Pan frying dumplings: start with a hot skillet and oil, add water to fully cook the dumplings, and finish by letting the water evaporate to brown the outside
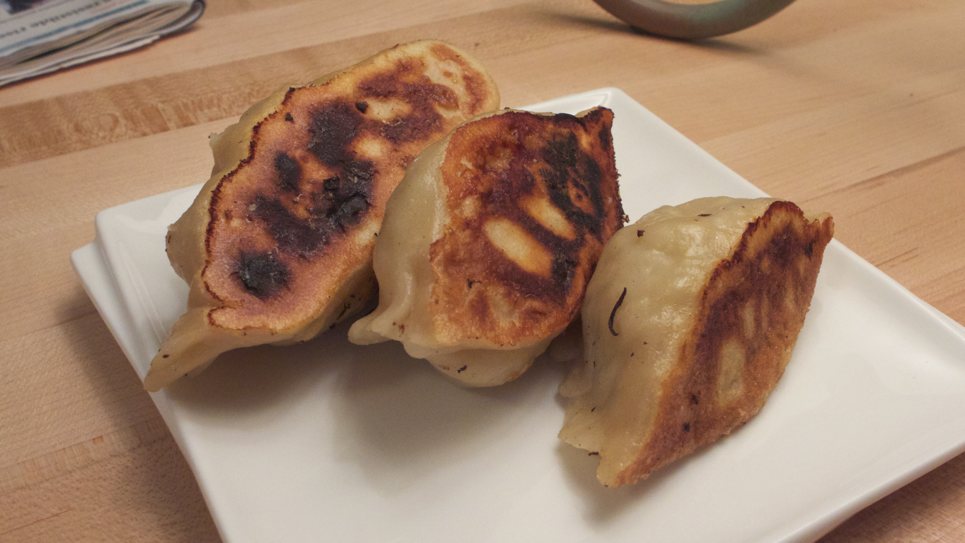
We pan-fried the dumplings in traditional fashion by filling a hot skillet with a thin layer of oil, searing the dumplings until they turned golden brown, adding water and covering the skillet to allow steam to cook the interior filling, and then letting the water fully evaporate to impart a golden-brown and crispy exterior on the dumplings. Paired with a simple dipping sauce made of soy sauce and vinegar, Nathan and I feasted on our delicious, from-scratch, labor-intensive pan-fried potstickers.
The next day, I sent a triumphant picture of the dumplings to my parents, to which my dad responded, “Are they burnt?!”